Post by Rock Spyder on Aug 4, 2004 8:26:47 GMT -6
Here is part 2 of the build up of the Jeep..
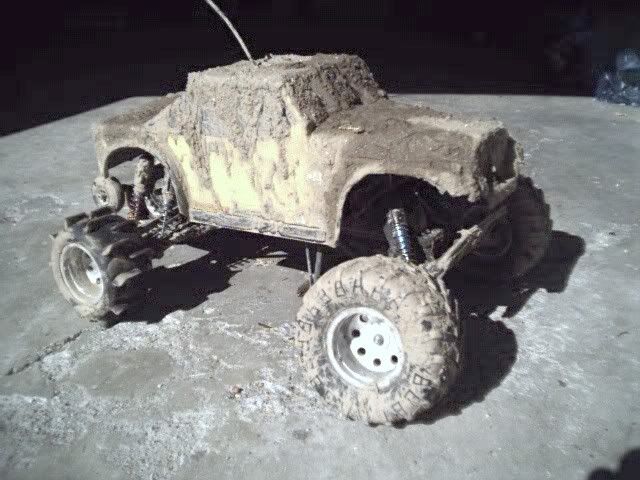
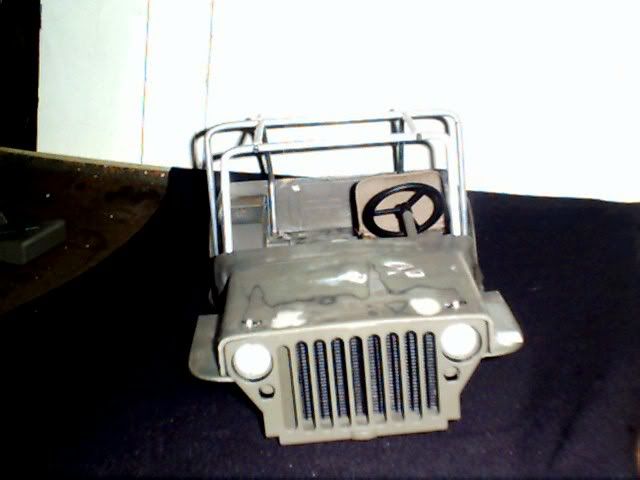
This as stated before in the other post is a Military Style Jeep body 1/6th scale...
So far it has been shaved bobbed and cut up to make the perfect crawler from....
Now onto what has happened so far.
1. We filled in all of the open holes on the body and rounded the edges along the bed line and front cab area to give it a look of a Fiberglass tub...
2. We then removed the front windsheild and bent it backwards a little and removed almost 1 inch from the height of it.
3. Moving to the rear of the body sections had to be cut to make room for the new Frame. Using Polystyrene the holes where filled in and shaped accordingly.
4. The hood is an opening style hood and using juggernaut body mounts we drilled the hood and mounted the mounts to the top of the lights on the grill section.. Doing this gave it a look of hood pins and worked really well to shape the frame around.
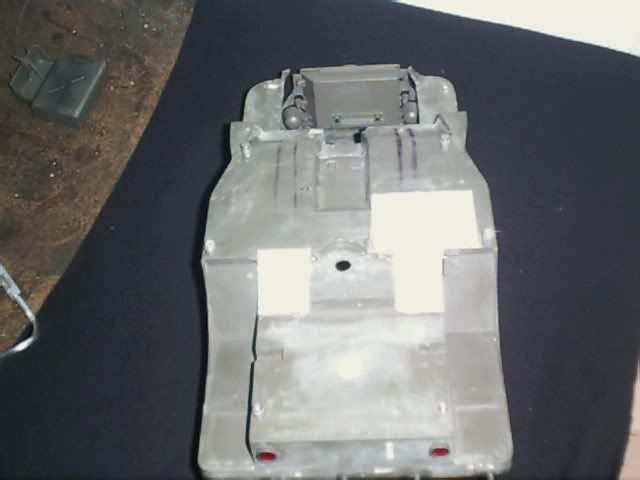
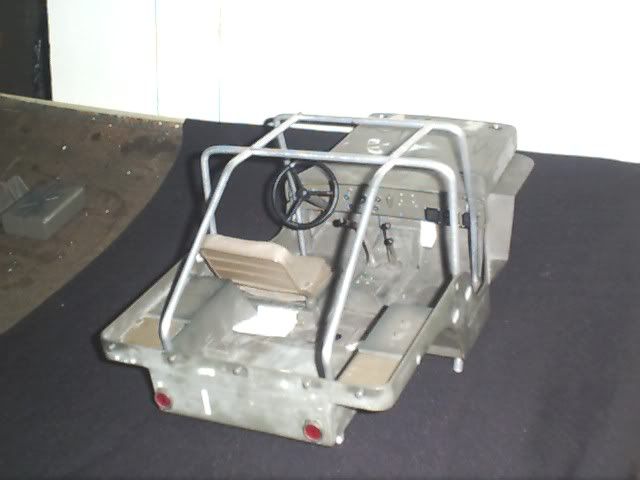
Now onto the custom Frame....
1. Using aluminum we narrowed the frame from 4" to 3.5 to give more room for shocks and mounts.. The Aluminum used was U channel and we bent the material in the shape of a Jeep frame after looking at pics of older Jeeps like the CJ and MJ series in the 70's.
2. Adding to the frame Mounts where made from 1/8th inch plate to make the 4 link mounts on the frame like real trucks.... and after making 8 of the plates they where fasioned to the frame using Rivits...
3. We then turned to the front Roll over bar.. and bending it with a pipe bender mounted it on the front of the frame in the same fasion using Rivits.. Rivits where used not only for ease but less worries should something come loose....
4. After getting everything mounted up, we added 2 1/4 inch aluminum bent rods to act as Battery holders and frame supports.. These where bent in a fasion to simulate the looks of tranny Supports on the bottom half of the truck...
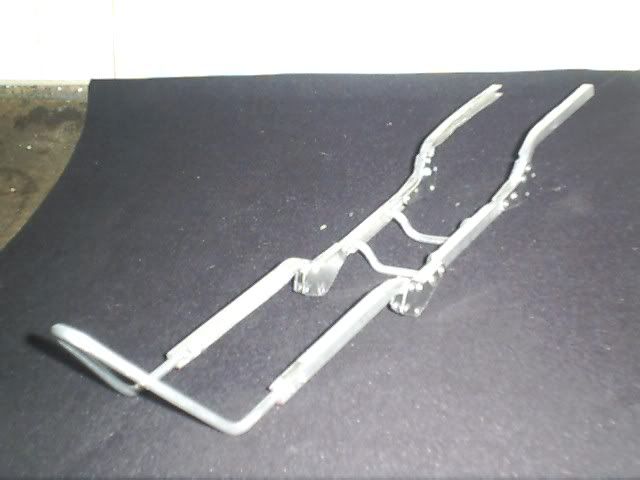
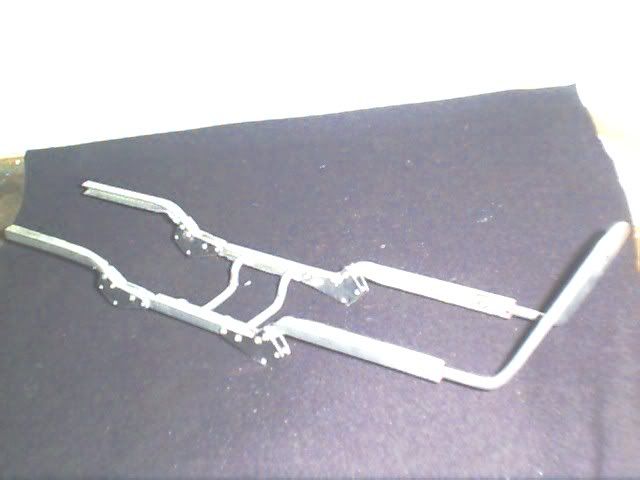
The Roll Cage....
The New body needed some kind of protectection...
And building a Tube frame for it was the perfect idea..
1. Starting with 1/4 inch aluminum rod, we bent the material with a pipe bender. Making sure to measure all corners and the height...
2. 2 holes where drilled in each of the Middle bars to allow screws to pass threw.. As seen in the pics...
3. Next after measuring distance and making sure everything was square. Center Rods and rear Drop Down bars where bent and added... These bars not only support the frame but add stiffness to the chassis.
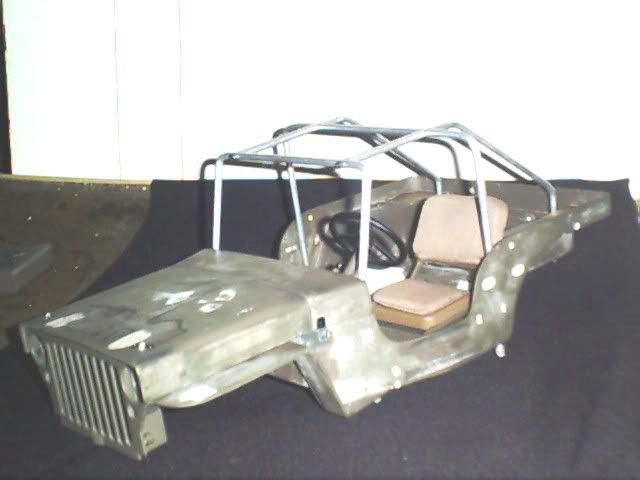
4. Finishing touches where adding from the original body 2 tail lights that had to be shaped to fit in the body.
Always when doing a project that requires cutting or glueing check and recheck your work area... Sometimes as we found if you do not you can make a small mistake that will cause you to start all over again... HEHE
The next installement of the Project jeep will be adding Nerf Bars and mounting the body to the Frame....
We have placed on order a new Small block Chevy Motor
in 1/6th scale as well as Braided fuel line...
Shock mounts will be made as well as finishing the frame up before painting...
Thanks
Tom
This as stated before in the other post is a Military Style Jeep body 1/6th scale...
So far it has been shaved bobbed and cut up to make the perfect crawler from....
Now onto what has happened so far.
1. We filled in all of the open holes on the body and rounded the edges along the bed line and front cab area to give it a look of a Fiberglass tub...
2. We then removed the front windsheild and bent it backwards a little and removed almost 1 inch from the height of it.
3. Moving to the rear of the body sections had to be cut to make room for the new Frame. Using Polystyrene the holes where filled in and shaped accordingly.
4. The hood is an opening style hood and using juggernaut body mounts we drilled the hood and mounted the mounts to the top of the lights on the grill section.. Doing this gave it a look of hood pins and worked really well to shape the frame around.
Now onto the custom Frame....
1. Using aluminum we narrowed the frame from 4" to 3.5 to give more room for shocks and mounts.. The Aluminum used was U channel and we bent the material in the shape of a Jeep frame after looking at pics of older Jeeps like the CJ and MJ series in the 70's.
2. Adding to the frame Mounts where made from 1/8th inch plate to make the 4 link mounts on the frame like real trucks.... and after making 8 of the plates they where fasioned to the frame using Rivits...
3. We then turned to the front Roll over bar.. and bending it with a pipe bender mounted it on the front of the frame in the same fasion using Rivits.. Rivits where used not only for ease but less worries should something come loose....
4. After getting everything mounted up, we added 2 1/4 inch aluminum bent rods to act as Battery holders and frame supports.. These where bent in a fasion to simulate the looks of tranny Supports on the bottom half of the truck...
The Roll Cage....
The New body needed some kind of protectection...
And building a Tube frame for it was the perfect idea..
1. Starting with 1/4 inch aluminum rod, we bent the material with a pipe bender. Making sure to measure all corners and the height...
2. 2 holes where drilled in each of the Middle bars to allow screws to pass threw.. As seen in the pics...
3. Next after measuring distance and making sure everything was square. Center Rods and rear Drop Down bars where bent and added... These bars not only support the frame but add stiffness to the chassis.
4. Finishing touches where adding from the original body 2 tail lights that had to be shaped to fit in the body.
Always when doing a project that requires cutting or glueing check and recheck your work area... Sometimes as we found if you do not you can make a small mistake that will cause you to start all over again... HEHE
The next installement of the Project jeep will be adding Nerf Bars and mounting the body to the Frame....
We have placed on order a new Small block Chevy Motor
in 1/6th scale as well as Braided fuel line...
Shock mounts will be made as well as finishing the frame up before painting...
Thanks
Tom